
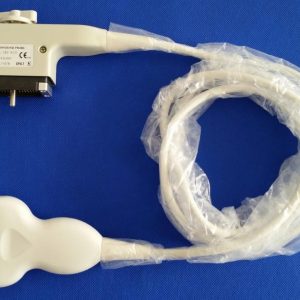
The Siemens Sonoline G60S — widely searched as the Acuson G60 — accepts a broad family of Sonoline-platform transducers covering abdominal, small-parts, vascular, cardiac, and endocavity imaging, so a compatible Siemens Acuson G60 probe is a realistic option when an original transducer fails or a department needs an additional head. Because the platform is discontinued, replacement units come from the refurbished and compatible market, which makes evidence discipline essential: match the exact probe model and part number, not the console badge, and get written confirmation of compatibility before paying. This guide lists the transducer models most often supplied for G60 installations, explains how to verify a used probe, and sets out when repair is the smarter spend.
Which transducers the G60 platform drives
The G60S was the more configurable general-imaging system of its Siemens generation, and its transducer catalogue reflects that range. The models below are the ones most commonly sourced for G60 installations. Frequency bands are approximate, drawn from the existing catalogue listings, and the part number on your existing probe is the final authority — not the marketing name on the connector housing.
| Model | Array type | Primary clinical use | Frequency band (approx.) |
|---|---|---|---|
| C5F1 | Curved (convex) array | General abdominal, OB, deep imaging | 1–5 MHz |
| C8F3 | Curved (convex) array | Pediatric abdominal, higher-resolution curved work | 3–8 MHz |
| VF10-5 | Linear array | Vascular, carotid, small parts | 5–10 MHz |
| VF13-5 (Sonoline) | Linear array | Thyroid, breast, MSK, superficial | 5–13 MHz |
| P4-2 | Phased array | Adult cardiac, abdominal, TCD | 2–4 MHz |
| P8-4 | Phased array | Pediatric cardiac, neonatal heads | 4–8 MHz |
| EC9-4 | Endocavity curved array | Transvaginal, transrectal | 4–9 MHz |
| CW2 | Pencil (CW Doppler) | Peripheral vascular Doppler | 2 MHz CW |
Individual catalogue pages exist for many of these heads — for example the C5F1 convex, the VF10-5 linear, the P4-2 phased array, and the EC9-4 endocavity. Treat those pages as discovery: they tell you the model exists in the market, not that a specific offered unit will run on your console.
Catalogue discovery is not compatibility evidence
Two points trip up buyers of discontinued-platform transducers. First, a connector photograph or a similar model name does not prove a probe will initialise on your system — Sonoline-era heads look alike across several Siemens generations, and pin-out and system-software expectations differ. Second, a listing that says “for G50/G60” is a seller’s claim, not a test result. Before committing funds, require in writing: the exact probe model and part number, the host system it will be used with (model and software revision), and the supplier’s return position if the probe does not initialise. Where any of this is ambiguous, the correct move is to pause the purchase until written compatibility evidence exists — never to guess.
Step-by-step: sourcing a replacement G60 transducer
- Record what you have. Photograph the probe label (model and serial), the connector, and the system “About” screen showing software revision.
- Define the clinical job. Abdominal convex work, vascular linear work, cardiac phased-array work, and endocavity work point at different models — the table above narrows the field.
- Search the catalogue by model string. Use the ultrasound probe catalogue and the Siemens/Acuson manufacturer section to see which heads are offered.
- Request written compatibility confirmation for your exact console model and software revision, plus the supplier’s testing and return terms in writing.
- Inspect on arrival. Check the lens and housing for damage, the cable for kinks or sheath cracks, and the strain relief for separation; then run the system’s transducer diagnostics and scan a phantom or known reference.
- Document everything. Keep the written confirmation, invoice, and arrival-condition photos with the probe’s service record.
How to judge a used probe before you rely on it
Physical condition predicts much of what matters. Crystal dropout shows as a consistent dark band across the image; dead elements show as streaks; lens delamination shows as a blurry or bubbly contact surface; cable damage shows as intermittent dropout when the cable is flexed. The multicentre probe-condition survey published in Ultrasound (the BMUS study) found that a substantial share of transducers in routine clinical use had faults the users were unaware of — which is exactly why arrival testing matters even when a seller is reputable. The AIUM statement on transducer testing and repair sets out what professional testing covers and why damaged probes should leave service; it is a useful benchmark when a supplier describes what their bench check includes.
Repair or replace?
Not every G60 probe problem justifies buying a replacement. Cable, strain-relief, and connector issues are often repairable at a cost well below a replacement head, and for a discontinued platform, repairing a known-good probe body avoids the compatibility question entirely. Array-crystal and internal damage are a different matter: those usually push the decision toward replacement. The decision rule is simple — if the fault is mechanical and the array is healthy, price a probe repair evaluation first; if the fault is in the array, source a compatible replacement using the steps above. Also factor reprocessing: any probe returning to service must follow the disinfection level required for its clinical use, per the CDC guidance on disinfection and sterilization of healthcare equipment, so an endocavity head with a compromised sheath is a replacement candidate regardless of image quality.
Common mistakes when buying a G60 probe
- Matching by console badge instead of part number. “G60” on a listing is not a part-number match.
- Trusting a connector photo. Similar-looking connectors across Siemens generations are not proof of electronic compatibility.
- Skipping written confirmation. A verbal “it should work” gives you no recourse when it does not initialise.
- Skipping arrival diagnostics. Faults invisible in photos — dropout, dead elements — show immediately in a phantom scan.
- Ignoring reprocessing requirements. An endocavity probe is also an infection-control item; sheath and lens condition are safety issues, not cosmetics.
Commercial next step
If you know the model you need, start from the catalogue and open the page for that exact head — the C5F1, VF10-5, P4-2, or EC9-4 pages linked above are typical G60 destinations. If you are still deciding between repairing the probe you have and sourcing a replacement, request a repair evaluation and a written compatibility quote in parallel; the numbers usually make the decision obvious.
Frequently asked questions
Which probes are compatible with the Siemens Acuson G60?
The G60S uses the Sonoline-platform family, including the C5F1 and C8F3 convex arrays, the VF10-5 and VF13-5 linears, the P4-2 and P8-4 phased arrays, the EC9-4 endocavity probe, and the CW2 pencil Doppler. Always confirm the exact part number against your console’s model and software revision in writing before buying.
Is a listing that says “fits G50/G60” enough proof of compatibility?
No. A listing is the seller’s claim, not a test result. Require written confirmation of the probe’s model and part number against your exact console, and a written return position if the probe does not initialise on your system.
Should I repair my G60 probe or buy a replacement?
If the fault is in the cable, strain relief, or connector and the array is healthy, repair is usually the lower-cost route. If the array crystals or internal electronics are damaged, replacement is normally the better spend. A repair evaluation gives you the evidence to decide.
What should I check when a used G60 probe arrives?
Inspect the lens for delamination, the housing for cracks, and the cable and strain relief for damage. Then run the system’s transducer diagnostics and scan a phantom or known reference to reveal dropout or dead elements that photos cannot show.
Sources
- AIUM — Transducer Testing and Repair (official statement on testing scope and removing damaged transducers from service)
- CDC — Disinfection and Sterilization: Healthcare Equipment (reprocessing levels by clinical use)
- Multicentre survey of ultrasound probe condition (BMUS) (prevalence of undetected probe faults in routine use)